...about God, family, home, living and enjoying the little things in life.
Sunday, August 5, 2018
Thursday, August 2, 2018
Tuesday, July 24, 2018
Transitioning To Natural Gray Hair & Rocking It!
Many of you have been following me on my "gray journey". I am happy to say that I am one step closer!!! This past week my hairstylist gave me an awesome haircut that is perfect for this transition. The cut blends the color and the gray that has grown out, wonderfully. I could not be more pleased!
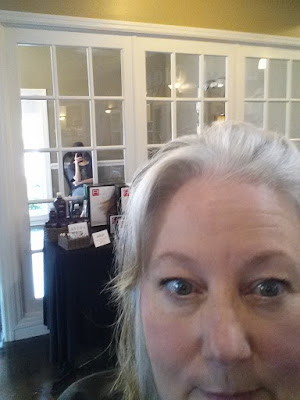
As you can seen in the photo below, a lot of my hair was cut off...
When you get to this stage, it is a good idea to have several photos saved from pinterest, blogs, etc. Also talk to your stylist. He/she knows your hair, what will work and be able to advise you on what the best cut will be for the look that you are going for. I had whole board full on Pinterest that I was able to access and show that included several style options for now and what I was going for 1-2 years down the road.
And then we got started!
Or at least, Brooke, my hairstylist got started. I mainly just sat there.
I never realized how silver or white my hair had actually gotten. I have been coloring it for so long.
My new style is so smart looking and looks like it is going to be very easy to care for and fix myself. (You know how hard that can sometimes be!) I do love it and will probably keep it until all of the color is grown and cut out.
I just love how the back looks!
Now if I were to be able to start all over again, there are 3 things that I would do differently.
Three Things That I Would Do Differently:
- I would not color just the roots around my part every 2-4 weeks. In 2-4 months it really just gives a bad "comb-over" effect.
- At the very start of the transitioning stage I would have the color in my hair totally bleached/lifted out.
- After having the color totally bleached/lifted out, I then would have have it tinted silver (either using a semi or demi tint/color) and maybe some lowlights added.
The above suggestions will make the transitioning almost seamless. There are many YouTube videos that show you the DIY, but honestly, it might be better to have your hairstylist do the color lifting and tinting for you. They know more about how to mix and apply the chemicals to get the results that you are looking for.
Are you transitioning? Thinking about transitioning? Comment below and tell us about it.
Hugs,
Missy
Tuesday, July 10, 2018
Tuesday, June 26, 2018
Going Natural ~ My Gray Journey Continues
Hi Friends! Many of you have been following my gray journey of transitioning to my natural hair. :-) Here is the latest video on my progress.
Thursday, May 31, 2018
Wednesday, May 2, 2018
What's For Breakfast?
or Brunch or Dinner or even a snack.
Official Wikipedia Definition: Frittata is an egg-based Italian dish similar to an omelette or crustless quiche or scrambled eggs, enriched with additional ingredients such as meats, cheeses or vegetables. The word frittata is Italian and roughly translates to "fried".
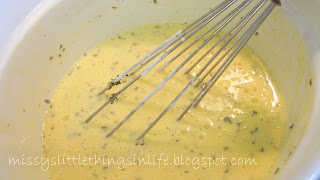
Add your one cup of greek yogurt and blend with whisk until smooth as you see in the photo below.

Next add your seasonings, lightly whisk until blended. Now you are ready to start cooking!
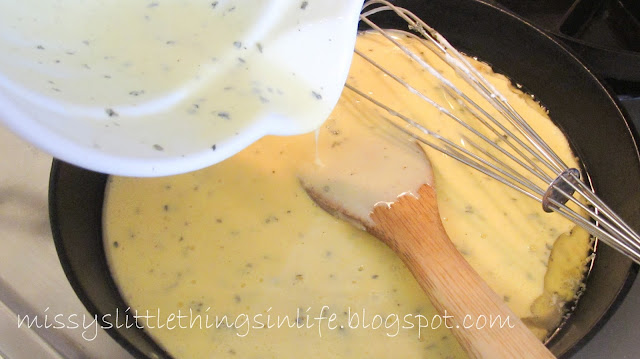
Heat up 1-2 tablespoons of avocado oil (or whatever oil you have on hand) in your iron skillet on medium high. Grate your 2 cloves of garlic and allow to lightly brown. Add your beaten egg mixture to the skillet. (NOTE: you may need to turn the heat down a tad.)
At this point it is so easy, almost like scrambling eggs. Add your other ingredients like cheese, veggies and any meat you might want to add. (Save the tomatoes for last.)
Stir the other ingredients into the egg mixture and keep stirring, lightly, mainly to keep the whole mixture from getting solid in places. Check to make sure your heat is not too high or too low. This is very similar to scrambling up a large vat of eggs.
When the mixture is just a tad less than 1/2 cooked, take the skillet off the heat and add your tomatoes.

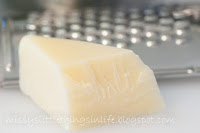
Then top with your finely grated parmesan or romano cheese.
Place in preheated oven and allow to finish cooking. It will take about 20-30 minutes. When it is ready it will be puffy and golden brown.
Allow to cool for about 15 minutes then slice just like you would a pie. Makes about 6-8 servings.
Garnish with greens, serve with a salad or fruit or both.
You can even eat it by itself. Delicious any want you want to serve it.
So Good!!! And one of those little things in life.
Tell me what ingredients you like to include in your Frittatas?
Enjoy!
Missy
Frittatas of course!
A dish packed full of protein, minerals and omega 3s. What is even better, you can make it your own! My family loves this dish. Great for a healthy breakfast, serve with brunch and also great for on the go and a great post workout meal. Stores well in the fridge and reheats well. Only 20 seconds in the microwave and it is ready to eat.
It is resembles a crustless quiche. My husband's cousin calls it an "egg pie" and basically, that is exactly what it is. Another great thing about frittatas is you can use up those fresh ingredients that have been sitting in your fridge. You know, the greens that are starting to wilt. I will even freeze these veggies and use them to make frittatas at a later time. They will still work great and be delicious!
Main Ingredients For A Frittata
Eggs, cheese, greek yogurt, spices, a few of your favorite vegetables and some cooking oil. You can also add meat, whatever you like. I do try to keep ours on the healthy side as much as I can.
And you will need a large cast iron skillet. Your frittata can be cooked in muffin pans, but I have never done that.
Basic Recipe:
Preheat oven to 375 degrees fahrenheit.
8 Large Eggs
1 Cup of Fat Free Greek Yogurt
1 Cup of Cheese (I used goat cheese here, makes it very creamy) shredded or crumbled
1 Tablespoon of Basil
2 Cloves of Garlic
Salt & Pepper to taste
Cooking Oil (I use Avocado Oil, wonderful flavor and works well in an iron skillet)
Additional Items:
1 Cup Asparagus, Washed & Cut (you can also use whatever greens that you have on hand. I love this with spinach, my daughter loves it with broccoli)
1 Pint of Mushrooms, Sliced
1 Cup of Tomatoes, Sliced, Halved or Chopped
Parmesan or Romano Cheese, finely grated
You can also add various meats or other vegetables that you and your family like.
You can find a printable copy of the recipe by clicking here.
Start with your eggs. Crack them into a mixing
Add your one cup of greek yogurt and blend with whisk until smooth as you see in the photo below.
 |
| Seasonings: Basil and Salt & Pep to taste |

Next add your seasonings, lightly whisk until blended. Now you are ready to start cooking!
Heat up 1-2 tablespoons of avocado oil (or whatever oil you have on hand) in your iron skillet on medium high. Grate your 2 cloves of garlic and allow to lightly brown. Add your beaten egg mixture to the skillet. (NOTE: you may need to turn the heat down a tad.)
At this point it is so easy, almost like scrambling eggs. Add your other ingredients like cheese, veggies and any meat you might want to add. (Save the tomatoes for last.)
Stir the other ingredients into the egg mixture and keep stirring, lightly, mainly to keep the whole mixture from getting solid in places. Check to make sure your heat is not too high or too low. This is very similar to scrambling up a large vat of eggs.

Then top with your finely grated parmesan or romano cheese.
Place in preheated oven and allow to finish cooking. It will take about 20-30 minutes. When it is ready it will be puffy and golden brown.
Allow to cool for about 15 minutes then slice just like you would a pie. Makes about 6-8 servings.
Garnish with greens, serve with a salad or fruit or both.
You can even eat it by itself. Delicious any want you want to serve it.
So Good!!! And one of those little things in life.
Tell me what ingredients you like to include in your Frittatas?
Enjoy!
Missy
Subscribe to:
Posts (Atom)


